When acquiring images, it is fairly common that more than just the target is ablated and analyzed. For example, maybe you want to be sure that you get the material boundaries or perhaps you are not exactly sure where the boundaries are, so you setup your sequence to cover a broader area. In doing so, a potential problem arises if the material ablated beyond your target is highly variable or orders of magnitude different concentration – making it unsightly and/or difficult to scale such that you can see the detail of your actual target.
In previous versions of iolite 4, you could setup a mask filter with channel criteria to select only the relevant part of the data. Depending on the nature of the sample, figuring out which criteria to use to select the area of interest can be tricky (or impossible). To get around this problem, we have just added (to v4.4.9) the ability to use a polygonal region of interest (ROI) as a clipping filter. Read on to see how!
How to…
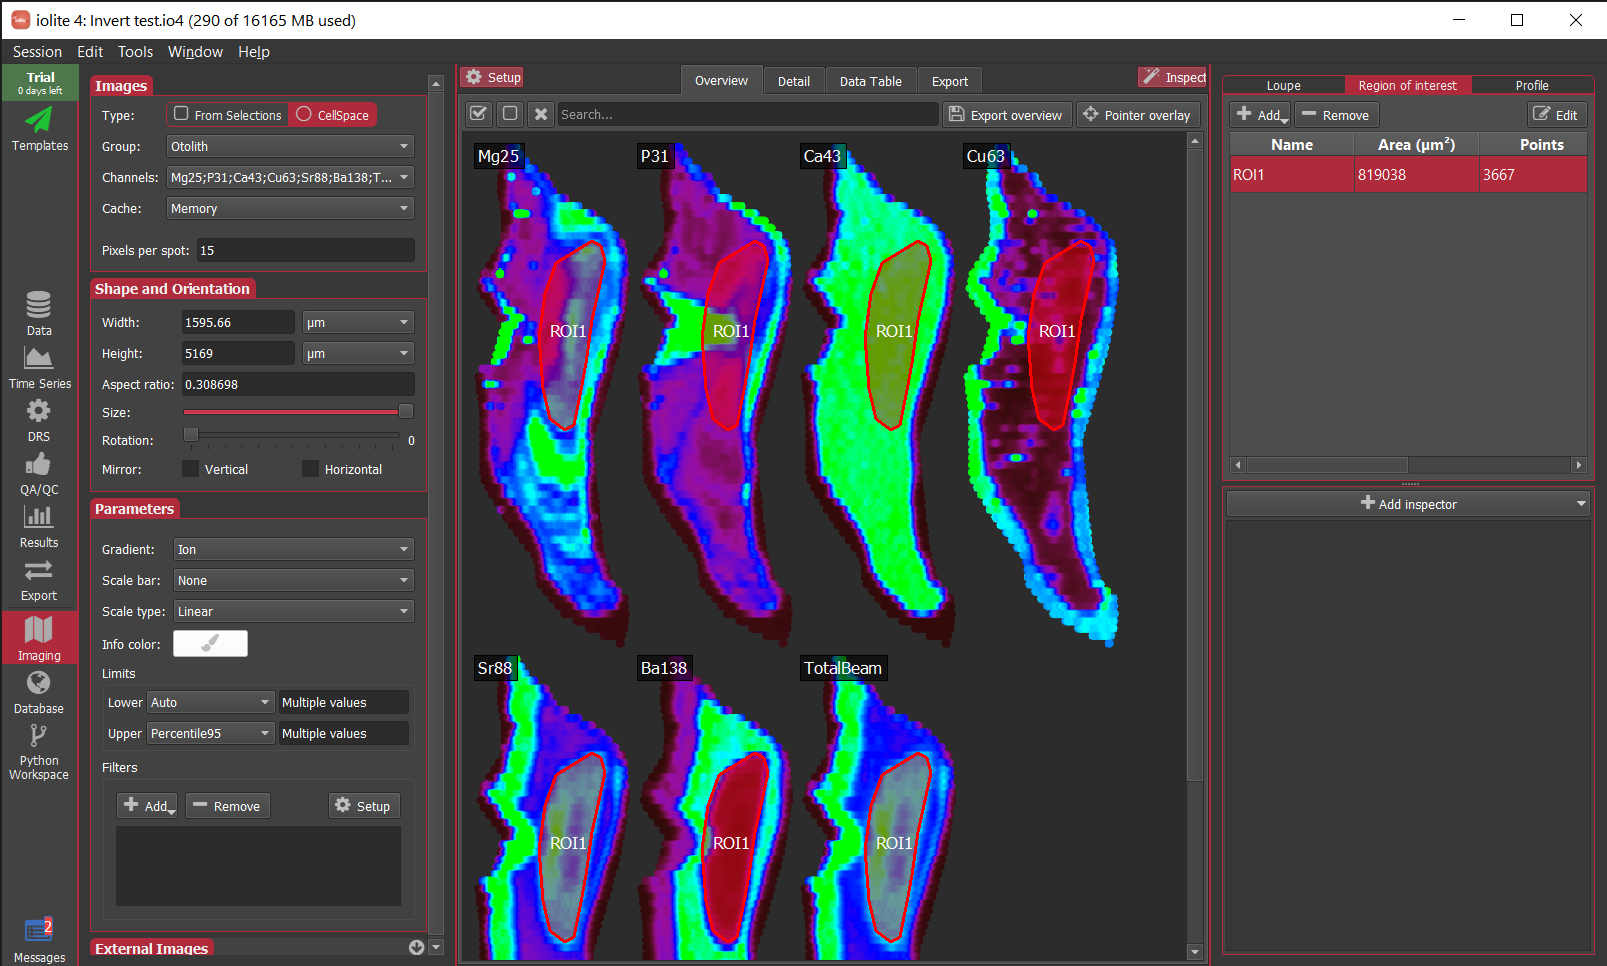
It is fairly straight-forward. First, you create a polygonal ROI covering the area of the image that you want to remain visible. You can do that by clicking the inspect button in the top right corner to expose the inspection panel. In that panel, you can go to the Region of interest tab and click the Add button. Now you can place a series of vertices for the ROI by clicking on an image and double clicking to complete the polygon. An example is shown below.

Then, you add a Clip image filter and select the ROI you want to use by name. The tools to add a filter are found in the Parameters section of the Setup panel on the left. When you click the Add button in the filters group you should select Clip. Initially, this may clip the entire image (i.e. it will disappear), but do not worry – you can now select the name of the ROI to clip by using the Setup button near the filters list. To continue the example, from above I’ve selected ROI1 created above.

Finally, with those steps complete, the images will now only render in the areas covered by the ROI as shown below for the otolith example.

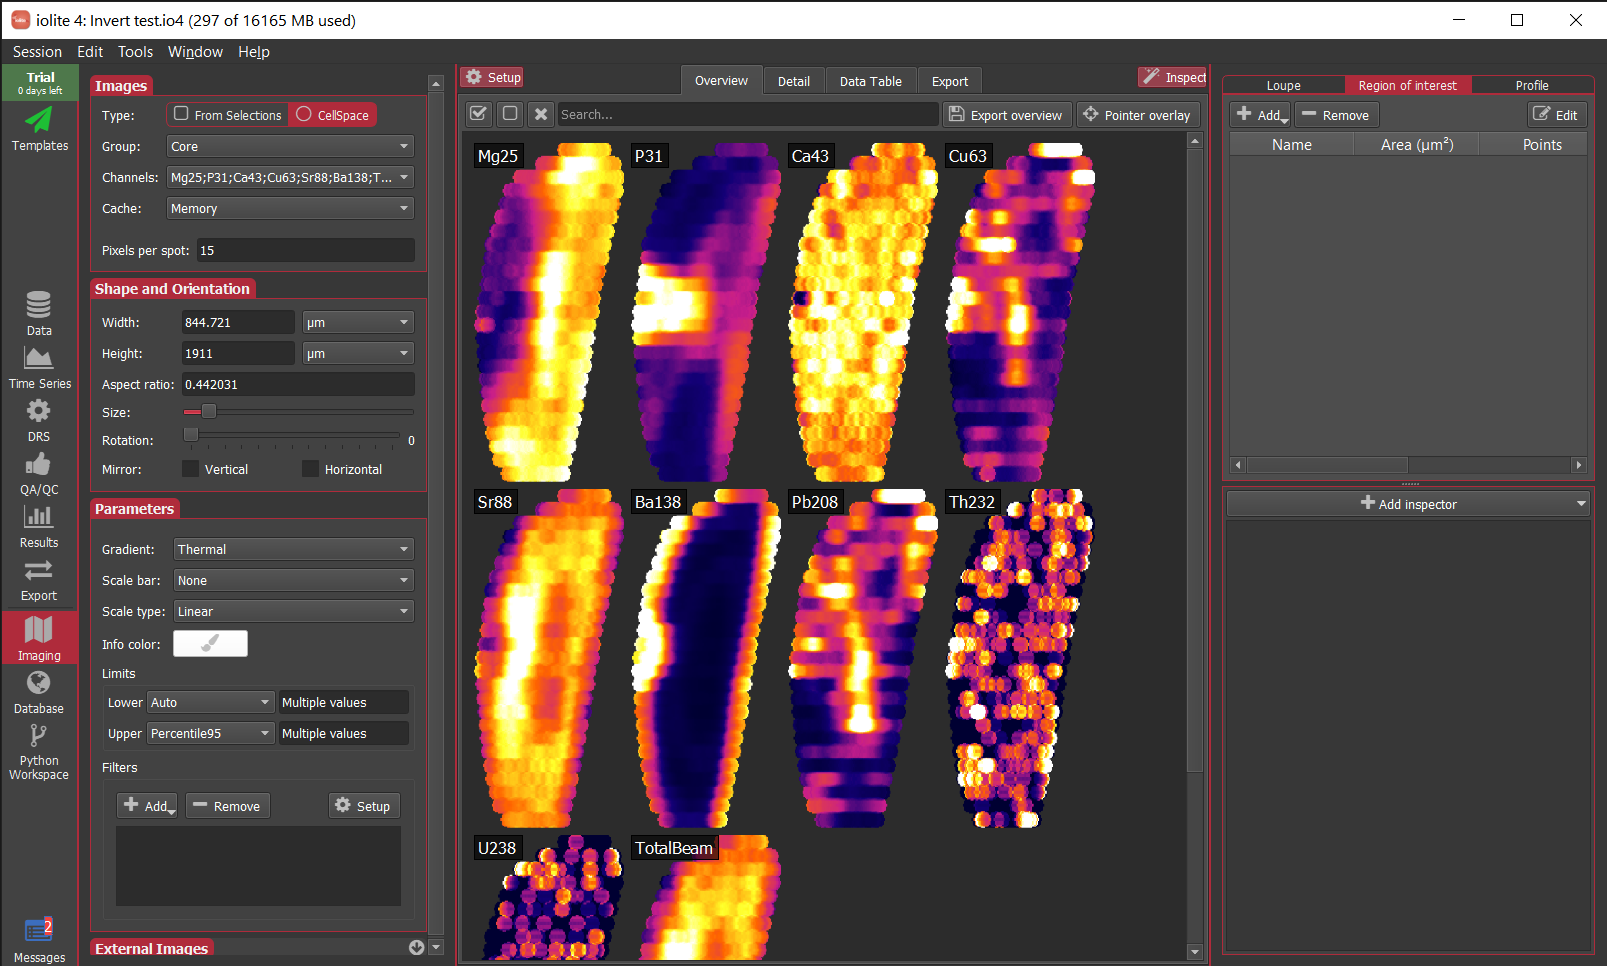
If you are bothered by a large amount of blank space when clipping to a significantly smaller area than was imaged, we’ve also just added the ability to turn a ROI into a selection group (right click on the ROI and select To selection group). If you’re doing cell space imaging, this will have a similar effect as shown below for the otolith. Note in this case that the ROI now occupies the entire area resulting in less blank space.

If you have any questions, comments or suggestions about this Note, you can discuss it here.